
Investment casting uses the wax patterns produced by special and unique toolings as per the required castings. The wax patterns (replicas) are surrounded by layers of bonded refractory materials to form a strong shell to withstand the hot molten metals and alloys. The de-wax process will remove the wax to allow a hollow cavity so the molten metal fill them to form the desired casting parts. That is why the investment casting is also called lost wax casting process. In modern investment casting foundry, the bonded materials are mainly refer to silica sol and water glass, which can make sure the fine surface of the investment castings. The investment casting process is often used to produce carbon steel castings, alloy steel castings, stainless steel castings and brass castings. Here in this article, we try to introduce the main steps of investment casting.
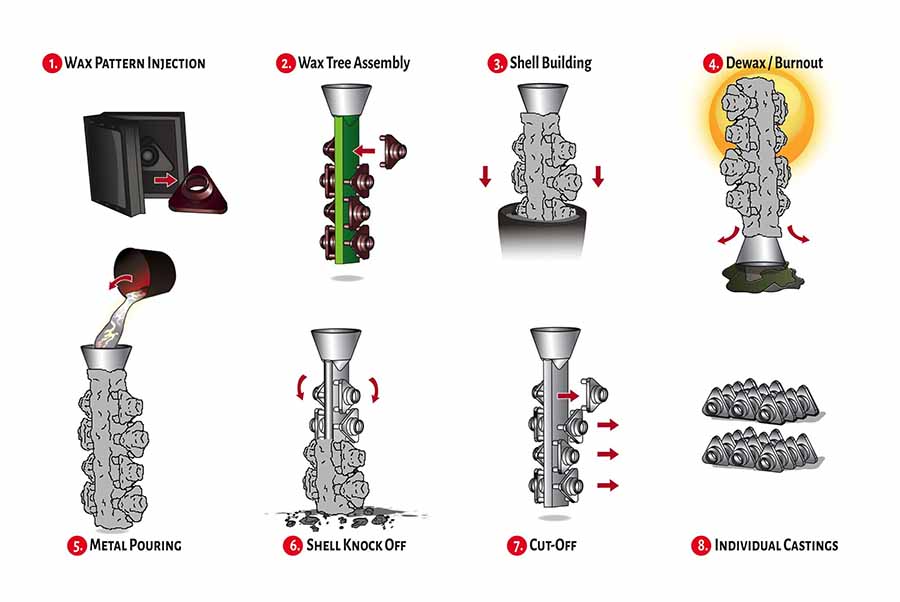
Develop the Tooling for Wax Injection
According to the desired castings and considering the allowance for post-machining and possible shrinkage, the engineers at investment casting foundry should design and produce the mold in metal (which is also called a "die") and toolings to produce the wax patterns.
Creating a Wax Pattern
In modern lost wax casting foundry, wax patterns are typically made by injecting wax into a metal tool or “die” with special injection machines. For multiple castings, a silicon tool is usually made from the artist’s sculpture and wax is injected or poured into the resulting cavity
Wax Tree Assembly
It is typically uneconomical to make small parts one at a time, so wax patterns are typically attached to a wax sprue. The wax between the pattern(s) and the sprue are called gates, because they throttle the direction and flow of the molten alloy into the void made by the pattern. The sprue serves two purposes
- 1. Provides a mounting surface to assemble multiple patterns into a single mold, which will be later filled with alloy
- 2. Provides a flow path for the molten alloy into the void created by the wax patterns.
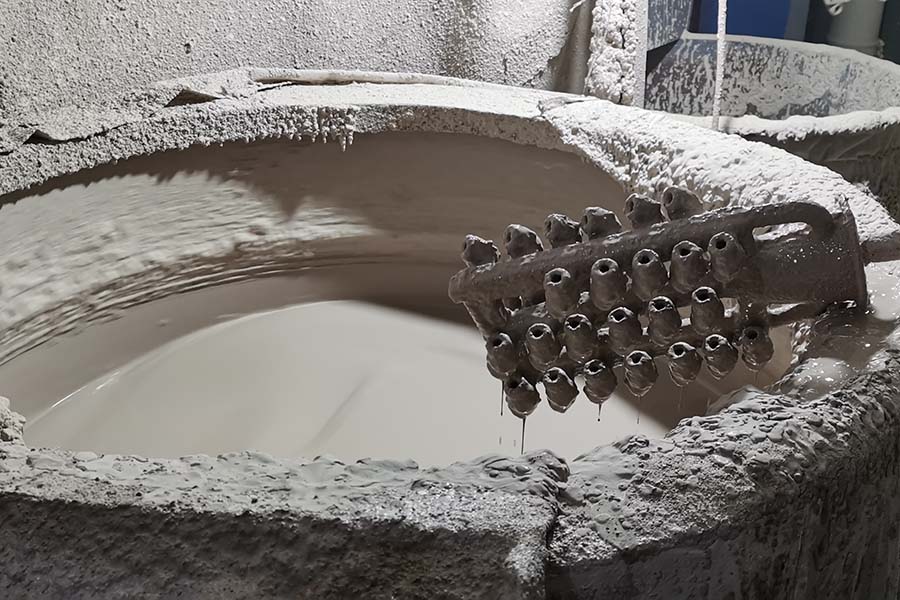
Shell Building
The next step in the process is to build a ceramic shell around the wax tree. This shell will eventually become the mold that metal is poured into. To build the shell, the tree is dipped into a ceramic bath or slurry. After dipping, fine sand or is applied to the wet surface. The mold is allowed to dry, and the process is repeated a several times until a layered ceramic mold, capable to withstand the stresses of the molten metal and alloys during pouring process.
Dewax / Burnout
Before pouring metal into the mold, the wax is removed by heating the shell. This is typically done in a steam-dewax autoclave, which is like a large, industrial pressure cooker. Another method is the use of a flash fire oven, which melts and burns off the wax. The wax could be collected and reused for making next wax patterns. Many investment casting foundries use both methods in concert. Flash fire burns off residual wax and cures the shell, ready for receive the molten metal and alloys.
Metal Pouring
Before the metal is poured into the ceramic mold or shell, the mold is preheated to a specific temperature to prevent the molten alloy from solidifying or freezing off before the entire mold is filled. Alloy is melted in a ceramic cup (called a crucible) using a process known as induction melting. A high frequency electric current creates a magnetic field around the alloy, generating electric fields inside the metal (eddy currents). The eddy currents heat the alloy due to the material’s electrical resistance. When the alloy reaches its specified temperature, it is poured into the mold, and the mold is allowed to cool.
Shell Knock Off
Once cool, the shell material is removed from the metal via mechanical methods such as hammer, high pressure water blasting or vibratory table. Shell removal can also be accomplished chemically, using a heated caustic solution of either potassium hydroxide or sodium hydroxide, but this approach is being phased out due to environmental and health concerns.
Cut Off
Once the shell material has been removed, the sprue and the gates are cut off manually or by chop saw, torch laser cutting. The cutting areas need to be grinded into a fine surface.
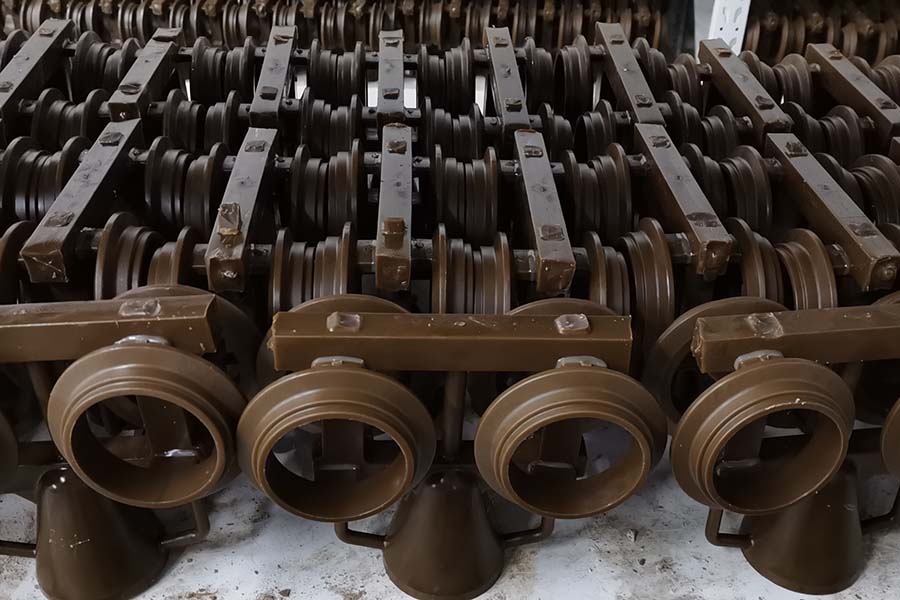
Individual Castings
After the parts are removed from the sprue, and the gates removed, the surface can be finished via a number of means such as vibratory, media finishing, belting, hand grinding, polishing. Finishing can be done by hand, but in many cases it is automated. Casting parts are then inspected, marked (if required), packaged and shipped. Depending on the application, the investment casting parts can be used in their “net shape” or undergo machining for precision surfaces.
Shell Building
Wax Patterns (Replicas)
Post time: Jan-18-2021